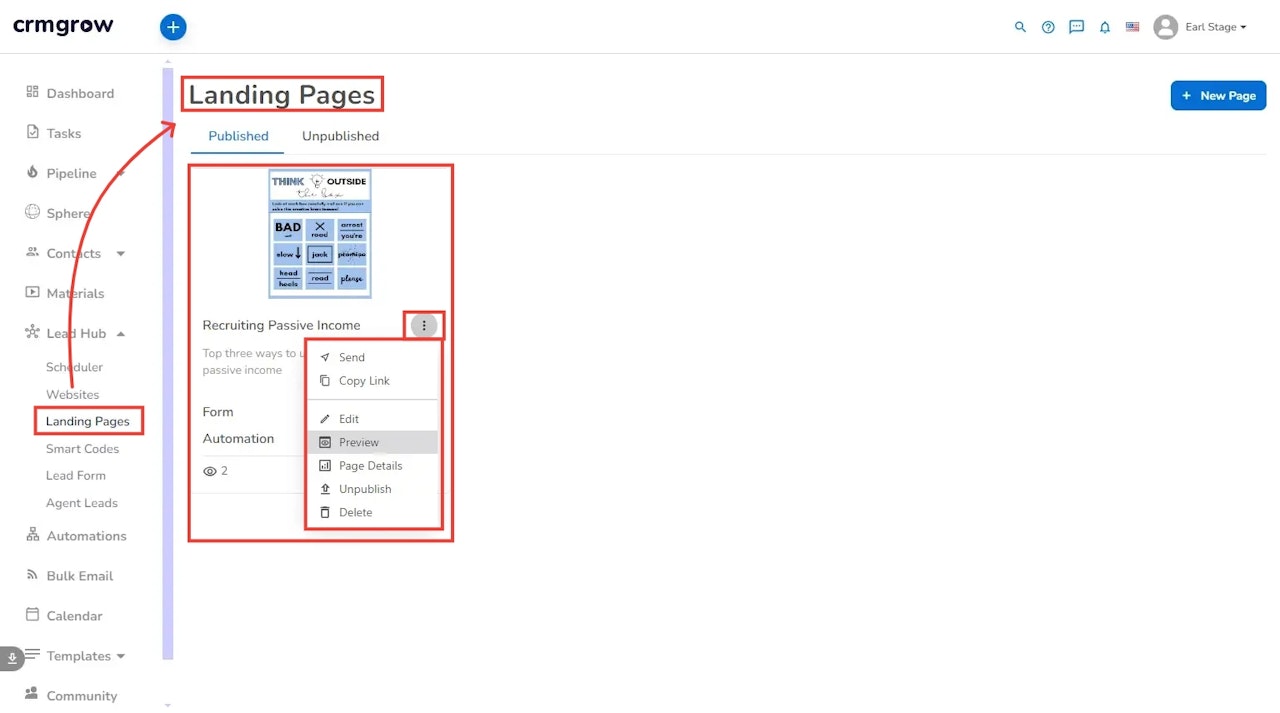

Published Lead Hub Landing Page Tile Overview
In this article, we will examine each part of a Published Landing Page tile and how to review its information efficiently. Although Published and Unpublished Lead Hub Landing Pages have some similarities, they also have significant differences.
Continue reading to understand how to interpret a Published Landing Page tile and make the most of its features.
Step 1
Click on "Lead Hub" on the system's left side.
Step 2
Click "Landing Pages."
*Note: Lead Hub Landing Pages will always open with "Published" tiles displayed.
Step 3
Locate the Landing Page you want to review.
-----------------------------------------------------------------------------------------
Tile Image
The Tile Image will preview the primary Media (Material) Video, Image, or PDF you have added to the Landing Page.
Page Name
This will be the name of the Page you added to the Landing Page when you created it.
Description
This will be the description of the Page you added to the Landing Page when you created it.
Form
The name of the Lead Form that you attached to the Landing Page.
Automation
The name of the Automation that you attached to the Landing Page.
----------------------------------------------------------------------------------------
Bottom Icon Section
Quickly access statistics by looking at the icons at the bottom of the tile.
Eye Icon
The "Eye" Icon will show you how often the Landing Page has been viewed.
People Icon
The "People" Icon will show you how many Contacts have seen the Landing Page.
Clipboard Icon
The "Clipboard" Icon shows the number of Contacts who signed up using the Lead Form attached to the Landing Page.
